
Dry and Cure The Buds
 After harvest, drying and curing your cannabis plants will ensure you get the best out of your buds.
After harvest it is now time to dry and cure the cannabis buds. This process can’t be rushed and by following this 2 step method you ensure that you get the best quality buds possible.
Don’t forget to cure the buds after drying;
- Curing the buds reduces the risk of the buds growing mold. Smoking mold infested marijuana can be dangerous.
- Curing will actually remove some of the side effects such as headaches and heavy coughing when smoking your home grown marijuana.
- Curing can even give your buds a higher quality by increasing the potency of your buds.
- It also gives you a much better taste when cooking or inhaling, since curing removes the bitter grass taste by breaking down the chlorophyll.
Drying the Marijuana Branches
As soon as your cannabis stalks have been harvested, you should begin the curing/drying process.
Before harvest, Wait!
Always plan before you start to harvest, the curing process needs to start within a couple of hours after the branches have been cut.
Hang the branches to dry
To make sure that you get the most out of this stage you should leave the buds on the branches after cutting. This will make the drying process more even and prevents the buds from completely drying out.
Drying buds on a Rack
A faster method to drying your plant is to remove the buds from the branch and spread them out individually on a rack making sure there is even air circulation. This can however result in lowered potency in the buds.
First few days of drying.
Keep your buds in a warm space with little to no sunlight and little moisture. Placing a fan indirectly will help reach this environment for the cannabis plants to dry and cure properly. There is no short cut to drying and curing your cannabis plant, giving your plants the full curing time will ensure that you get the most quality out of your plant.
Make sure you check your buds carefully to avoid any mold or fungus. If you see anything that is out of the ordinary or different with a bud separate the bud from the rest and discard it.

Curing Buds
 The curing process keeps just enough moisture or humidity in and around the cannabis flowers.
Ready for part two?
The hanging stage is complete when you can snap a small stem from the branch but have the main stem still bendable.
Moisture and humidity when curing.
The buds will contain moisture within the middle, when curing the buds this moisture will keep the buds from drying out, this is an important stage in the curing process.
Humidity levels.
Using a glass jar is the most optimal to get the best humidity levels for your buds in following stage.
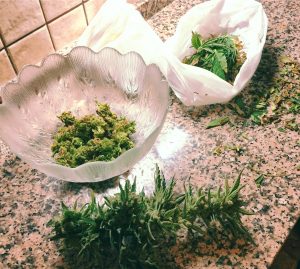
Starting the curing process.
Carefully remove the buds from the branches. Fill your jars up to approximately 2/3 of the way, leaving more room will result in a better curing process.
Moisture.
If your buds stick together and clump up, you should reintroduce the drying stage.
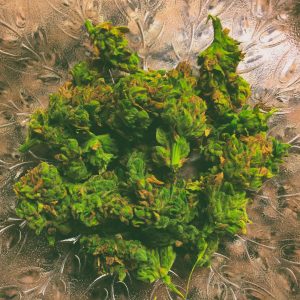
Dry buds.
If you are faced with dry buds, there are ways to reintroduce moisture. Using a humidifying agent can rehydrate your buds. Once the buds have reached desired humidity, remove the agent.
Check your buds.
Allow the buds to be introduced to fresh air everyday for a week or two. Mix the buds and check for any mold or fungi. After this, only open your jar once a week.
Longterm curing.
Ideally, to get the most of your plant, you should cure your buds for 3 months. If they continue to cure with no signs of mold or fungi, you will be able to store your buds for a longer time. Make sure to keep your buds in a dark place and sealed airtight. If you keep the buds longer than 4 months make sure you vacuum seal the buds.